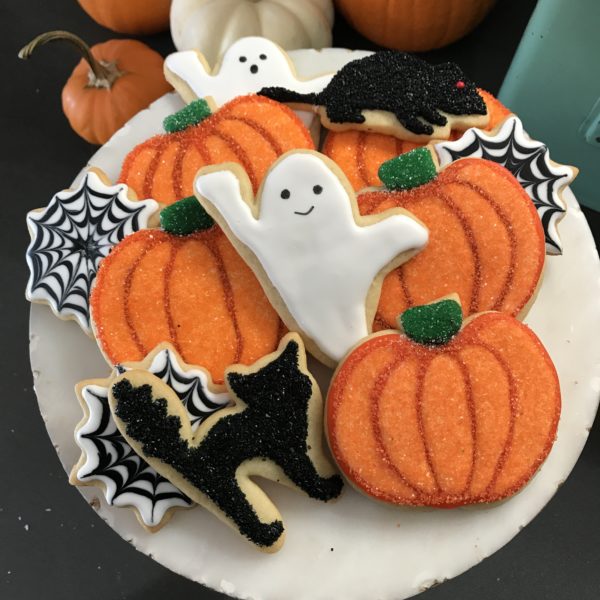
I made some fun Black and White Halloween Cookies this week. But when I went to take pictures they just didn’t pop. What the pics really needed was some color for the black and white to stand out against. So I revved the oven back up and baked some pumpkins from the same sugar cookie dough recipe I make all my holiday-themed cookies with. 
These cookies are a bit bigger than my usual fare, so they’re perfect for wrapping in clear bags and giving as gifts to teachers, neighbors and non-paranoid Trick Or Treaters. Like the black and white ones, you don’t need any special equipment and all the ingredients can be purchased in your grocery store baking aisle. 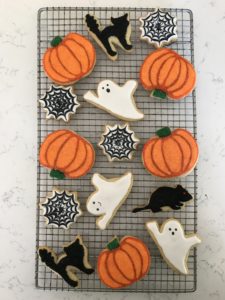
There are a few steps to making these and a bit of waiting so make sure to give yourself a few hours for decorating. Most of that is passive drying time, the active decorating only takes about 30 minutes for a dozen or so cookies. Once you get them baked (scroll down for tips on baking sugar cookies), follow the directions below to make your friendly, sparkly pumpkins:
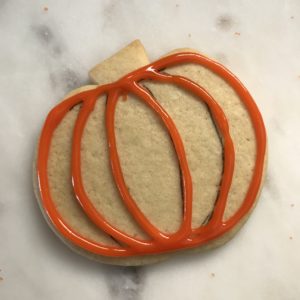 Step One: Using orange Betty Crocker Cookie Icing, outline the pumpkin and give it some ribs. Allow to dry for about an hour. I drew on my cookie with an edible food marker first because I’m not a great at drawing and wanted to be sure of my lines, but that’s totally optional.

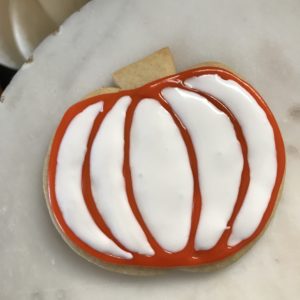
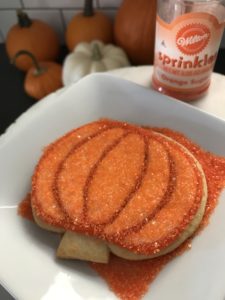 Step Two: Doing one pumpkin at a time, use white Betty Crocker Cookie icing to fill in between the ribs of the pumpkin. Use a toothpick to get the frosting into the tight corners. Immediately cover the pumpkin in orange sanding sugar then tap off the excess. Repeat with all remaining pumpkins. Let cookie dry for about 30 minutes.
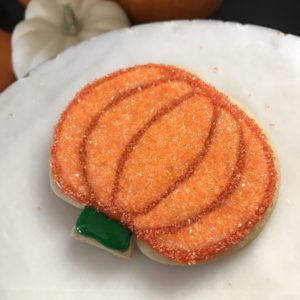
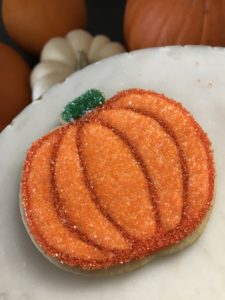
Step Three: Using green Betty Crocker Cookie Icing, pipe a little stem onto each pumpkin then cover with clear decorating sugar. Tap off the excess. Allow to dry for at least 4 hours before stacking and storing, preferably overnight.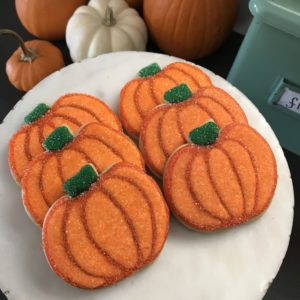
These cookies don’t require any fancy piping tips or bags, just the Betty Crocker cookie icing and an edible food marker, both things you can buy in the baking aisle. I know you probably think you don’t have the time or creativity or whatever to decorate Halloween cookies, but I really think you do. I have a lot of little tricks to make it easy and pretty foolproof:
- Don’t try and do it all in one session. The cookies actually turn out better if you let the dough sit overnight in the fridge and the cookies dry out in a container on your counter for a few days. It’s also just less overwhelming to do one stage at a time. I usually make my dough 2-7 days before I need the cookies. I do dough one day, bake the cookies another day and decorate them on a third day. Doing it this way you also get the bonus smugness of feeling like your life is organized and under control.
- Skip the royal icing. It’s really tricky to get the consistency right if you’re inexperienced. When I make royal icing I actually get out a timer and count how many seconds it takes for the drizzled icing to get smooth, then adjust it by adding infinitesimal amounts of water with a spray bottle. You don’t want to do that right? Betty Crocker cookie icing can be found in the baking aisle of most major grocery stores. It comes in a range of colors (look for the black and orange in your seasonal aisle along with the Halloween decorations and chocolates) and sets up hard like royal icing so you can put them in treat bags or stack them. It comes with a piping tip attached that you can cut to make any size line you like. It also tastes pretty darn good! I actually prefer it to royal icing, it’s more like a corn syrup glaze.
- Keep your decorations simple. Do one design for each shape you cut out. It may seem boring but the consistency will make it look more “professional”. And lots of designs are deceptively hard to make look good. I know because I’ve tried and failed many times.
- Heed the directions. These sugar cookies are super buttery and have lovely crisp edges. Because of all that butter they need to be chilled in the fridge between cutting out and baking or they will lose their shape. If you can’t wait the full 15 minutes, you can put them in the freezer for 5-7 minutes instead.
- Bake one sheet at a time. This will give you the most consistent results. You want to bake them until the edges are just starting to brown, for me that’s right at the 11 minute mark but my oven is temperamental and trying to mentally break me. If you take them out too soon, they may get mushy when you add the moisture of the icing.
- Remember that they’re only cookies and that they will still taste good no matter how goofy they look. I get a kick out of making pretty things and taking pretty pictures and sharing on the interwebs. But cookies are meant to be eaten, not viewed, so just go for it.
Happy Halloween!
| Servings |
|
- 1 cup unsalted butter softened
- 1 cup sugar
- 2 eggs
- 1 teaspoon vanilla extract
- 1 teaspoon almond extract
- 1/2 teaspoon salt
- 1 teaspoon baking soda
- 3 cups all-purpose flour
- 1 package white Betty Crocker cookie icing
- 1 package green Betty Crocker cookie icing
- 1 package orange Betty Crocker cookie icing
- orange decorating sugar sometimes called sprinkles or sanding sugar
- clear decorating sugar sometimes called sprinkles or sanding sugar
Ingredients
|

|
- In the bowl of your electric mixer (or with a hand mixer), beat the butter and sugar until light and fluffy (about 3 minutes). Add the eggs, vanilla extract, and almond extract and beat until combined. Add the salt and baking soda and beat to combine. Add the flour and beat until you have a smooth dough. Divide the dough in half and wrap each half in plastic wrap. Refrigerate for at least one hour, preferably overnight.
- Preheat oven to 350 degrees.
- Remove one half of the chilled dough from the refrigerator and, on a lightly floured surface, roll out the dough to a thickness of 1/4 inch (1 cm). (Keep turning the dough as you roll, making sure the dough does not stick to the counter.) Cut out your pumpkins and transfer cookies to baking sheet. Place the baking sheets with the unbaked cookies in the refrigerator for about 15 minutes to chill the dough which prevents the cookies from spreading and losing their shape while baking.
- Bake cookies for about 8-11 minutes (depending on size) or until the edges are just starting to brown. Remove from oven and let cookies cool on baking sheet for a few minutes before transferring to a wire rack to finish cooling. Decorate the pumpkins using the steps shown above. Be sure to let the icing dry at least 4 hours before storing.

Stunning as usual!
Thank you Jen ❤️